
Why Your Epoxy Garage Floor Might Fail (And How to Fix It)
Why Epoxy Garage Floors Fail More Often Than You’d Expect
Epoxy garage floor issues plague homeowners across the country, turning what should be a durable flooring investment into a costly headache. Whether it’s peeling under hot tires, bubbling from moisture, or developing slippery spots that become safety hazards, these problems are more common than most people realize.
The most common epoxy garage floor issues include:
- Peeling and delamination – Often caused by poor surface preparation or moisture problems
- Bubbling and blistering – Usually from trapped moisture or improper mixing ratios
- Hot tire pickup – When vehicle tires literally pull the coating off the concrete
- Premature wear and scratching – From applying thin coats or using low-quality materials
- Yellowing and fading – UV exposure breaks down traditional epoxy polymers
- Slippery surfaces – Creating safety risks, especially when wet
Research shows that up to 80% of epoxy floor failures stem from improper surface preparation, while DIY epoxy kits can have failure rates as high as 30% within just two years. The good news? Most of these problems are preventable when you understand what causes them.
While epoxy has been the go-to garage floor coating for decades, modern polyaspartic coatings offer superior durability, faster curing times, and better resistance to the issues that plague traditional epoxy systems.
As a concrete coatings specialist, I’ve seen countless epoxy garage floor issues that could have been avoided with proper installation techniques and better coating technology. My experience developing advanced polyaspartic coating systems has shown me exactly why epoxy fails – and how to prevent those failures from happening in the first place.
Epoxy garage floor issues terms to remember:
Improper Surface Preparation: The #1 Epoxy Killer
Here’s the truth that’ll save you thousands of dollars: improper surface preparation causes up to 80% of all epoxy garage floor issues. It’s like trying to paint over a greasy pan – no matter how good your coating is, it’s going to fail spectacularly.
I’ve walked into countless garages where homeowners are scratching their heads, wondering why their “professional-grade” epoxy is peeling up like old wallpaper. The answer is almost always the same: someone skipped the prep work or did it wrong.
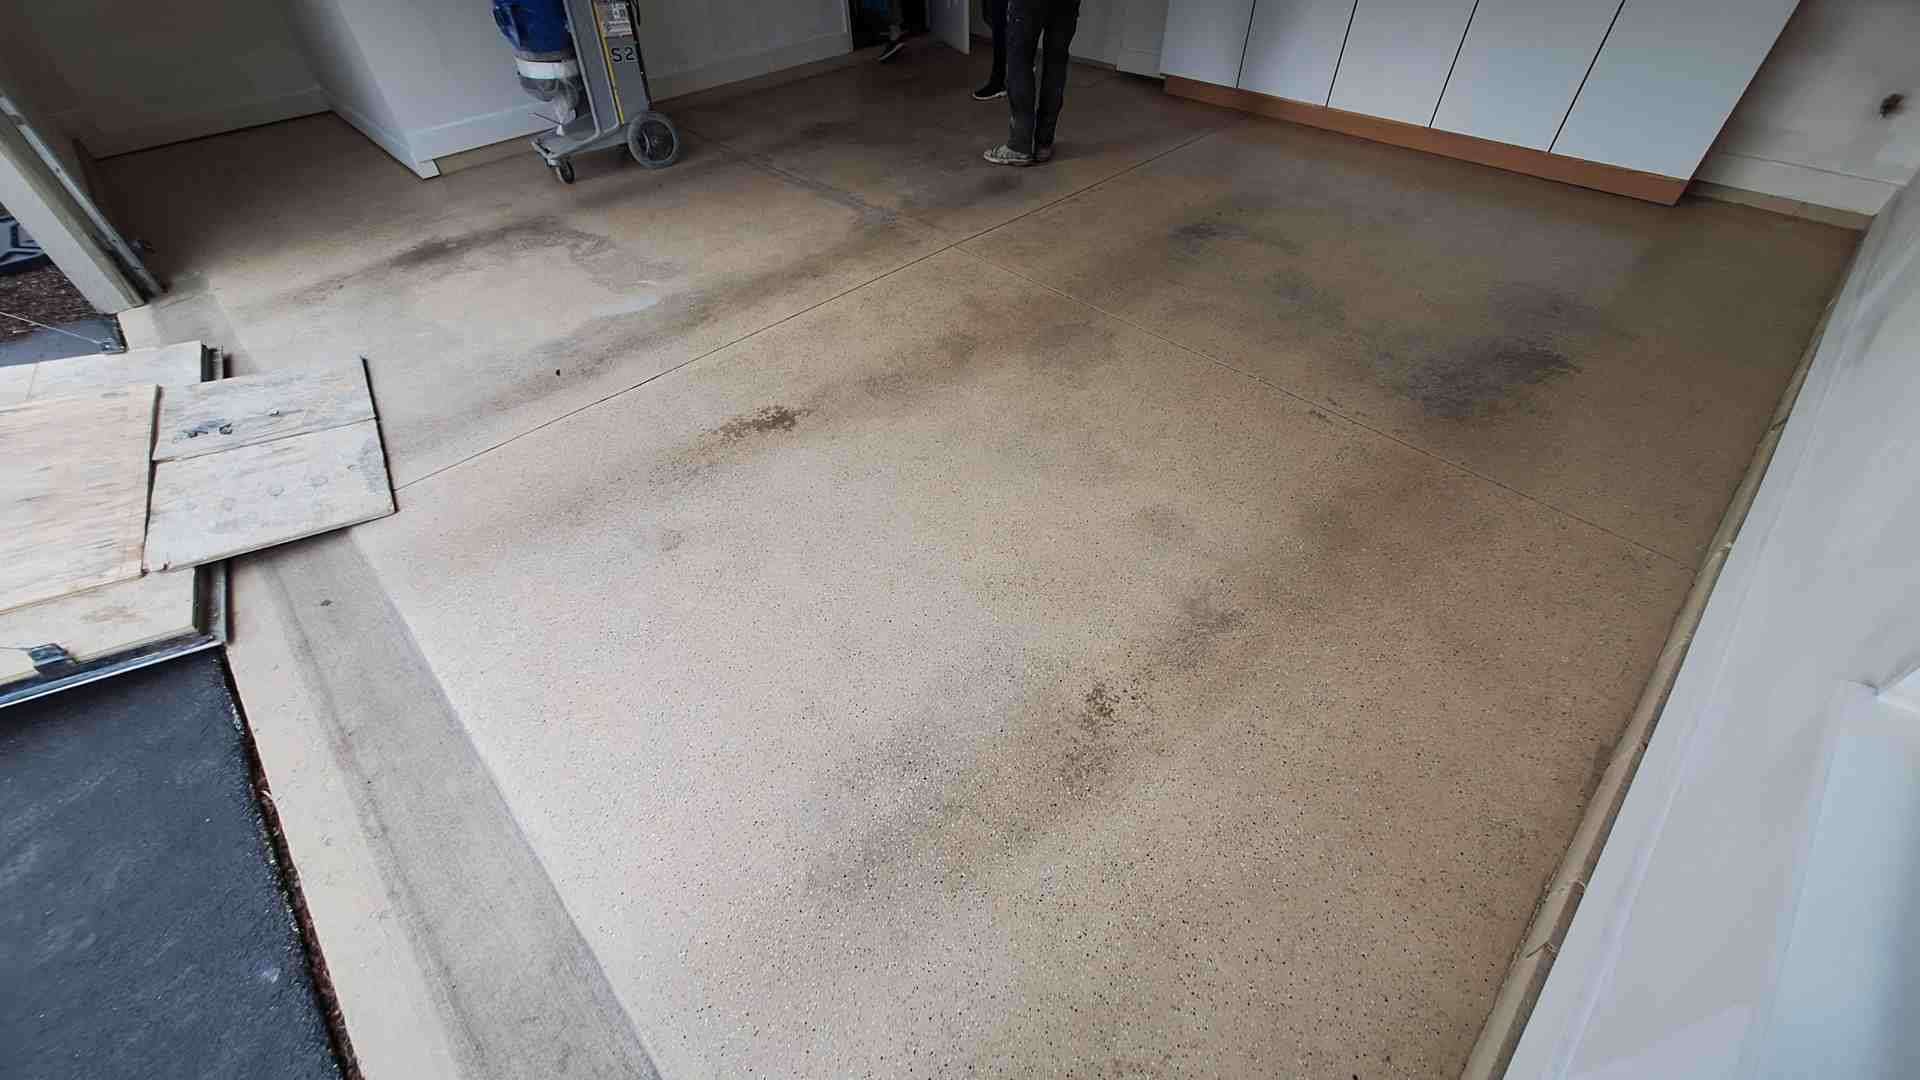
Diamond grinding isn’t just a fancy technique – it’s absolutely essential for creating the right concrete surface profile. Think of it as giving your concrete a good exfoliation. Without proper mechanical grinding, you’re basically asking epoxy to stick to a surface that’s smoother than it appears.
The process involves thorough degreasing (because even invisible oil residue creates coating failures), followed by dust-free vacuuming that removes every particle of debris. Those microscopic oil stains from years of parking? They create what we call “fisheyes” – circular spots where the coating simply can’t bond.
This is why Galaxy’s polyaspartic systems consistently outperform traditional epoxy. Our mechanical preparation process ensures proper adhesion, while our advanced chemistry bonds better to concrete than old-school epoxy ever could. For more details on proper preparation techniques, check out our comprehensive guide on Garage Floor Coatings.
How “Smooth as Glass” Concrete Causes Epoxy Garage Floor Issues
Here’s something that surprises most homeowners: perfectly smooth concrete is actually epoxy’s worst enemy. Those beautiful, glass-smooth garage floors that look so pristine? They’re setting you up for epoxy garage floor issues down the road.
The CSP rating (Concrete Surface Profile) measures surface roughness on a scale of 1-10. Most epoxy systems need at least CSP-3 to bond properly – that means your concrete needs visible texture and open pores for the coating to grab onto.
Acid etching sounds impressive, but it typically only achieves CSP-1 or CSP-2. That’s why so many DIY projects fail within the first year. The surface looks clean and slightly textured, but it’s nowhere near rough enough for proper adhesion.
Galaxy uses professional diamond grinding equipment to consistently achieve the proper CSP rating. This mechanical preparation opens up the concrete’s pores, removes surface contaminants, and creates the anchor pattern that prevents peeling and delamination.
It’s more work upfront, but it’s the difference between a coating that lasts decades and one that starts failing before your first oil change.
Mixing & Curing Mistakes: When Chemistry Goes Wrong
Epoxy coating is essentially a controlled chemical reaction between resin and hardener – and like any chemistry experiment, precision is absolutely critical. Epoxy garage floor issues frequently stem from mixing mistakes that seem minor but create major problems down the road.
The most common mixing errors include ratio mistakes (eyeballing measurements instead of using precise ratios), exceeding pot life (continuing to work with material that’s already starting to cure), skipping induction time (not allowing the mixed components to properly activate), and ignoring exothermic heat buildup (which can cause the coating to cure too quickly and become brittle).
We’ve walked into garages where sections of epoxy never fully cured, leaving tacky spots that collect dirt and debris months after installation. Other areas become so brittle they crack under normal foot traffic, while some sections remain permanently soft and vulnerable to damage.
The mixing process itself requires specific techniques. Using a mixing paddle at low RPM (under 400) prevents air entrapment while ensuring complete chemical reaction. High-speed mixing might seem more efficient, but it introduces countless tiny bubbles that weaken the final coating and create a cloudy appearance.
| Mixing Aspect | Correct Method | Common Mistake | Result of Mistake |
|---|---|---|---|
| Resin:Hardener Ratio | Exact manufacturer specs | Eyeballing measurements | Incomplete cure, soft spots |
| Mixing Speed | Low RPM (under 400) | High speed mixing | Air entrapment, bubbles |
| Induction Time | 2-5 minutes as specified | Skip waiting period | Poor chemical crosslinking |
| Pot Life | Use within 30-45 minutes | Exceeding working time | Premature thickening |
Epoxy Garage Floor Issues from Bad Batches—Or Bad Math
Here’s the truth about epoxy garage floor issues: most aren’t caused by defective products – they’re caused by mixing errors. Even experienced contractors sometimes get sloppy with measurements, but epoxy chemistry is absolutely unforgiving.
Digital scale accuracy makes all the difference. We weigh every component to ensure accuracy within 1% of the specified ratio. A 5% deviation might not sound like much, but it can mean the difference between a coating that lasts decades and one that fails within months.
Batch tracking has become essential in our quality control process. When we encounter any issues (which is rare), we can trace back to specific mixing ratios, environmental conditions, and application techniques. This systematic approach helps us identify patterns and continuously improve our processes.
The reality is that epoxy requires perfection at every step. Unlike regular paint that can tolerate some variation, epoxy’s chemical reaction either happens correctly or it doesn’t. There’s no middle ground, and there’s no fixing it once the reaction begins.
Waiting vs. Walking: The Real Curing Clock
One of the biggest misconceptions about epoxy involves cure time. Just because the surface feels dry doesn’t mean it’s ready for action. Epoxy coatings require up to 72 hours to reach full cure, and using the floor too early can reduce surface durability by up to 50%.
Hot tire pickup represents one of the most frustrating epoxy failures. When vehicles with warm tires park on incompletely cured epoxy, the coating literally lifts off the concrete like a giant sticker. We’ve seen this happen even weeks after installation when the coating didn’t cure properly due to temperature or humidity issues.
Premature traffic creates permanent damage that can’t be repaired – only replaced. Walking on epoxy before it’s fully cured creates microscopic indentations that collect dirt and make the floor impossible to keep clean. Heavy items placed too early leave permanent impressions that mar the surface forever.
This extended cure time is exactly why we’ve moved to polyaspartic coatings for most applications. Our Polyaspartic vs Epoxy Floor Coatings comparison shows how polyaspartic systems cure in hours rather than days, eliminating the extended downtime and premature traffic risks that plague traditional epoxy installations.
Moisture & Temperature: Invisible Forces that Ruin Floors
Picture this: you’ve just installed a beautiful epoxy floor, everything looks perfect, and then weeks later – disaster. Bubbles appear, sections start lifting, and you’re left wondering what went wrong. The culprit? Invisible moisture and temperature forces that turn your dream floor into a nightmare.
Moisture is truly epoxy’s silent assassin. Vapor drive from beneath the concrete slab pushes moisture upward, creating pressure that literally lifts the coating off the surface. This underground moisture movement causes blistering that can appear days, weeks, or even months after installation.
But moisture problems don’t just come from below. Dew point condensation during installation can trap water between the concrete and coating. When ambient humidity is high, moisture in the air condenses on the concrete surface, creating an invisible barrier that prevents proper adhesion.
Temperature swings add another layer of complexity. Cold concrete in a warm, humid environment becomes a condensation magnet. Hot concrete can cause epoxy to cure too quickly, leading to poor adhesion and brittleness. We’ve seen epoxy garage floor issues develop simply because the installer didn’t account for the concrete’s temperature.
That’s why we never guess about moisture conditions. Calcium chloride tests measure the rate of moisture vapor transmission through concrete, while in-slab relative humidity (RH) measurements give us precise readings of moisture content within the concrete itself. These aren’t optional steps – they’re essential for preventing failures.
The science behind moisture testing is fascinating and critical for success. For detailed technical information on proper moisture evaluation, check out this scientific research on concrete moisture.
Ambient humidity during installation creates its own challenges. High humidity can cause epoxy blush – a cloudy, milky appearance that indicates the coating didn’t cure properly. This isn’t just a cosmetic issue; it signals compromised durability and performance.
Detect, Don’t Guess: DIY Moisture Tests that Work
Want to avoid moisture-related disasters? Start with the plastic sheet test – the simplest way to check for moisture problems. Tape a clear plastic sheet tightly to your concrete and wait 24-48 hours. If you see condensation droplets or dark wet spots underneath, you’ve got moisture issues that need addressing before any coating goes down.
For more precise results, RH probes inserted directly into the concrete slab provide accurate moisture readings at different depths. These probes tell you exactly what’s happening inside the concrete, not just on the surface.
When moderate moisture issues are detected, moisture barrier primers can sometimes solve the problem. These specialized primers create a barrier that blocks moisture transmission while still allowing the topcoat to adhere properly.
Outgassing is another moisture-related phenomenon that catches many installers off guard. As concrete releases trapped air and moisture, it creates tiny bubbles and pinholes in the epoxy coating. This process can continue for weeks after installation, gradually weakening the coating.
Understanding these moisture dynamics isn’t just technical knowledge – it’s the difference between a successful installation and a costly failure. We always recommend proper testing rather than gambling with guesswork, because moisture-related epoxy garage floor issues often don’t show up until it’s too late to prevent them easily.
Post-Install Threats: UV, Chemicals & Slipperiness
Your epoxy floor might survive the installation process, but that’s just the beginning of its challenges. Even when properly installed, epoxy faces a constant battle against forces that can turn your beautiful garage floor into a maintenance nightmare.
UV exposure is epoxy’s arch-nemesis. Those garage door openings that let in natural light? They’re slowly breaking down your epoxy coating. Traditional epoxy starts showing yellowing and fading in as little as 6-12 months, especially in sunny climates. What starts as a crystal-clear coating gradually turns amber, then yellow, robbing your floor of its original beauty.
Chemical exposure adds another layer of complexity. Your garage isn’t just a place to park – it’s where oil changes happen, batteries leak, and brake fluid spills. Battery acid can etch permanent marks into epoxy surfaces, while brake fluid and other automotive chemicals can cause staining and surface degradation that’s nearly impossible to repair.
But here’s what catches most homeowners off guard: slipperiness. Traditional epoxy becomes dangerously slick when wet, increasing slip-and-fall risk by up to 40%. That light rain tracked in on your shoes or a small water leak can turn your garage into an ice rink.
The solution lies in anti-slip additives like silica grit or decorative flakes, but these must be properly incorporated during installation. You can’t just sprinkle them on top and hope for the best – they need to be broadcast into the wet coating to ensure proper adhesion and long-term effectiveness.
If you’re exploring different coating options, our guide on Acrylic Garage Floor alternatives explains how various coatings handle these post-install challenges – though modern polyaspartic systems consistently outperform both epoxy and acrylic options.
Safety First: Fixing Slick Epoxy Before the Next Rainstorm
Traction isn’t optional – it’s essential for garage safety. We’ve seen too many homeowners find their epoxy’s slippery nature the hard way, usually during the first rainy season after installation.
The key to effective traction grit application is timing and technique. We broadcast the grit into our coatings while they’re still wet, ensuring the particles become permanently embedded rather than just sitting on the surface. This creates lasting slip-resistant properties that won’t wear away with normal use.
Slip-resistant topcoats can be applied over existing smooth epoxy, but this is more of a band-aid solution. The topcoat adds another layer that can potentially fail, and it doesn’t address the underlying epoxy garage floor issues that created the slippery surface in the first place.
OSHA guidelines recommend slip-resistant surfaces in work areas, and your garage workshop deserves the same safety standards as any commercial facility. Proper traction elements should be part of the original installation plan, not an afterthought when someone nearly slips and falls.
The most effective approach is incorporating traction during the coating process. Whether it’s aluminum oxide grit for maximum durability or decorative flakes for aesthetic appeal, these additives maintain their effectiveness throughout the coating’s lifespan when properly installed. Trying to add traction after the fact rarely delivers the same long-term performance.
From Epoxy Headaches to Polyaspartic Peace of Mind
After years of watching homeowners struggle with epoxy garage floor issues, we finded something that changed everything: polyaspartic technology. It’s like comparing a horse and buggy to a rocket ship – both get you places, but one takes you to the stars.
Polyaspartic coatings solve virtually every problem that makes epoxy fail. While epoxy requires perfect conditions and days of downtime, polyaspartic systems offer one-day installation regardless of weather. We can apply these coatings in temperatures from -40°F to 104°F, compared to epoxy’s narrow 50-90°F sweet spot.
The advantages are stellar. Polyaspartic cures in hours rather than days, completely eliminating hot tire pickup issues. UV exposure that turns epoxy yellow and chalky? Our polyaspartic coatings laugh at sunlight, maintaining their color for decades. Chemical spills that etch epoxy surfaces barely leave a mark on polyaspartic.
Low VOC emissions mean you’re not breathing harsh fumes during installation, and our lifetime warranty coverage shows just how confident we are in this technology. It’s coating technology that’s truly out of this world.
For a detailed comparison of why we made the switch, check out our Polyaspartic Coatings for Garage Floors guide. The difference is astronomical.
Fast-Track Fix: Resurfacing Failed Epoxy with Polyaspartic
When epoxy fails, most homeowners think they’re stuck with an expensive, multi-day nightmare. Not with Galaxy’s polyaspartic resurfacing process. We can transform your failed floor into a stellar surface in just one day.
Our fast-track fix process starts with complete mechanical removal of the failed coating – no shortcuts here. We perform thorough crack repair and surface preparation to ensure your new floor has the foundation it deserves. Then comes the magic: our flake broadcast system with UV-stable clear coat that transforms your garage from disaster zone to showroom.
The entire Galaxy process takes just one day:
- Morning: Mechanical removal and crack repair
- Midday: Primer and base coat application
- Afternoon: Decorative flake broadcast
- Evening: UV-stable clear topcoat application
- Next morning: Ready for your car
This comprehensive approach ensures your new polyaspartic coating won’t suffer from the same issues that caused your original epoxy to fail. We’re not just covering up problems – we’re launching your floor into a new orbit of performance and durability.
Frequently Asked Questions about Epoxy Garage Floor Issues
Why did my brand-new epoxy start peeling under the tires?
Hot tire pickup is like watching your investment literally stick to your car tires – and it’s one of the most frustrating epoxy garage floor issues homeowners face. This happens when two things go wrong: either the coating hasn’t fully cured, or the surface preparation was about as thorough as a quick sweep.
Here’s the science behind the frustration: epoxy needs a full 72 hours to reach cure strength, but many people get impatient and park their cars too early. When warm tires meet incompletely cured epoxy, the coating becomes as clingy as plastic wrap. Even worse, if the concrete wasn’t properly profiled during preparation, the epoxy sits on top like a sticker rather than bonding into the surface.
The thermal stress from hot tires is the final straw that breaks the weak adhesion. It’s why we see so many garage floors that look perfect until someone actually uses their garage for parking.
Can I repair bubbles and pinholes without grinding the whole floor?
The honest answer? It depends on what’s causing those bubbles, but most of the time, spot repairs are like putting a band-aid on a broken pipe. Small, isolated bubbles might respond to sanding and topcoating, but widespread bubbling usually signals deeper problems.
Epoxy garage floor issues like extensive bubbling typically indicate moisture problems or mixing errors during installation. These aren’t surface-level problems you can sand away – they’re systemic issues that affect the entire coating system. Moisture vapor pushing up from below the concrete doesn’t just create one bubble; it creates ongoing pressure that will find new weak spots.
We’ve seen too many homeowners spend time and money on patch repairs, only to watch new bubbles appear weeks later. When the root cause isn’t addressed, you’re essentially playing bubble whack-a-mole. Full removal and proper reinstallation might cost more upfront, but it saves the frustration of repeated failures.
How long before I can park on a freshly coated floor?
This is where epoxy’s biggest weakness becomes crystal clear – the waiting game. Traditional epoxy coatings need 24-48 hours before you can walk on them and a full 72 hours before parking vehicles. But here’s the kicker: full cure can actually take up to a week, depending on temperature and humidity.
During Colorado winters or Arizona summers, those cure times can stretch even longer. Cold temperatures slow the chemical reaction, while high heat can cause the epoxy to cure too quickly on the surface while staying soft underneath. Either scenario increases your risk of premature failure.
This extended downtime is exactly why Galaxy switched to polyaspartic coatings. Our systems are ready for full vehicle traffic in just 4-6 hours – not days, not weeks, but hours. You can literally have your garage floor coated in the morning and park your car that same evening. It’s like the difference between waiting for a slow-cooking pot roast versus grilling a steak – both might taste good, but one gets you eating a lot sooner.
The peace of mind that comes with knowing your floor is truly ready when we say it’s ready? That’s priceless for busy families who can’t afford to keep their garage out of commission for days.
Conclusion
You don’t have to live with epoxy garage floor issues forever. While traditional epoxy coatings have dominated the garage flooring market for years, their track record speaks for itself – and it’s not pretty. Hot tire pickup, moisture blisters, premature wear, and chemical staining are just the cost of doing business with old-school epoxy technology.
That’s exactly why Galaxy Concrete Coatings launched our mission to take concrete flooring out of this world. Our polyaspartic coating systems solve the problems that have plagued homeowners for decades. No more waiting days for your floor to cure. No more worrying about hot tires peeling up your investment. No more watching your beautiful new floor turn yellow and fade.
When you choose Galaxy, you’re getting more than just a coating – you’re getting a lifetime warranty backed by the most advanced flooring technology in the galaxy. Our one-day installation means you can park your car tonight, not next week. Our UV-stable formulation means your floor will look stellar for decades, not months.
Our customers across the country have launched thousands of successful projects, and their outstanding reviews reflect our commitment to delivering floors that truly are astronomical. We’ve built our reputation one satisfied customer at a time, and our industry-leading ratings show that our mission to provide superior concrete coatings is right on target.
Ready to blast off from epoxy garage floor issues to polyaspartic perfection? For more information about cost-effective solutions, check out our guide on affordable garage flooring. Our stellar team is standing by to help you reach new heights of garage floor excellence in these locations:
- Denver, Colorado – Garage Floor Coating Denver
- Phoenix, Arizona – Garage Floor Coating Phoenix
- Tucson, Arizona – Garage Floor Coating Tucson
- Cincinnati, Ohio – Garage Floor Coating Cincinnati
- Indianapolis, Indiana – Garage Floor Coating Indianapolis
Don’t let epoxy failures keep your garage floor grounded. With Galaxy Concrete Coatings, your floor will be stellar for a lifetime. Mission accomplished!