Top Coat Transformation: Resurfacing Your Concrete Driveway Made Easy
Transform Your Driveway: A Complete Guide to Concrete Resurfacing
Learning how to skim coat concrete driveway surfaces can seem like a quick way to fix a worn, cracked, or discolored surface. Here’s a brief overview of the process:
- Clean the surface – Remove all dirt, oil, and debris with a 3,500 psi pressure washer.
- Repair major damage – Fill cracks larger than 1/4″ with a patching compound and let it cure.
- Mix the resurfacer – Combine the concrete resurfacer with water to a smooth, pourable consistency.
- Apply in sections – Pour and spread the mixture using a long-handled squeegee in manageable sections.
- Create texture – Use a concrete broom within 5 minutes for a non-slip finish.
- Allow proper curing – Wait at least 6 hours before walking and 24-48 hours before driving on the surface.
A cracked or stained driveway can detract from your home’s curb appeal. While a DIY skim coat—a thin, 1/16 to 1/8-inch layer of cementitious material—can cover minor cosmetic issues like small cracks and discoloration, it’s a temporary fix, not a structural repair. It can improve aesthetics, but it won’t last against vehicle traffic and weather exposure.
For a driveway change that lasts for decades, professional polyaspartic coatings offer superior durability, customization, and long-term value. While a skim coat might fail within a few years, a professionally installed polyaspartic system from Galaxy Concrete Coatings can protect your driveway for a lifetime. This guide will explore both the DIY skim coat process and the professional alternative that can take your driveway from worn-out to stellar.
The Universe of Driveway Renewal: A Guide on How to Skim Coat Concrete Driveway
When your driveway shows minor blemishes, a skim coat can seem like an appealing DIY solution. It’s a surface-level repair designed to give your concrete a fresh look without the cost of a full replacement. However, it’s a cosmetic refresh, not a structural overhaul. For more on rejuvenating your driveway, explore our guide on Concrete Driveway Resurfacing.

The DIY Skim Coat Process and Its Pitfalls
A skim coat is a thin, 1/16 to 1/8-inch layer of cement-based material applied over existing concrete to hide minor imperfections like hairline cracks, pitting, or discoloration. While it can improve aesthetics, it’s crucial to understand its limitations. A skim coat is purely for surface-level issues and will not fix deep cracks, heaving, or underlying slab problems. For a deeper understanding of concrete itself, you can visit this resource on concrete composition and properties.
Achieving even a temporary result with a skim coat requires a precise process where mistakes can easily lead to failure:
-
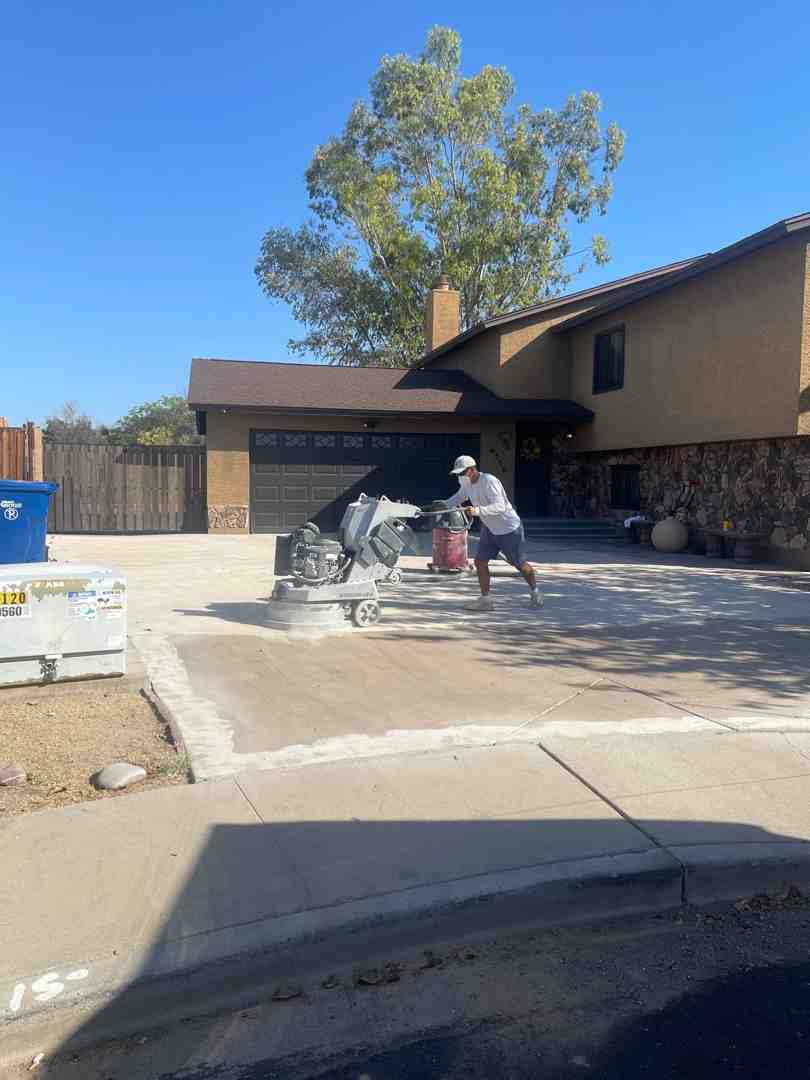
Preparation is Critical: The single most important step is preparing the surface, as poor adhesion is the top cause of failure. This involves deep cleaning with a 3,500+ psi pressure washer to remove all contaminants. For a truly strong bond, the concrete should be mechanically ground to create a textured profile—a step often skipped in DIY projects. Our guide on Concrete Floor Surface Preparation details why this is essential. Any cracks wider than a credit card must also be repaired and fully cured.
-
Mixing and Application: The resurfacer must be mixed with a power drill to a lump-free, pancake-batter consistency. The mixture has a short workable time of only 20-30 minutes, which shrinks in warm weather. You must work quickly in small, manageable sections, spreading the material evenly with a squeegee. To create a non-slip texture, a broom finish must be applied within five minutes of spreading.
-
Curing and Conditions: The weather must be perfect—ideally between 70-75°F, with no rain, and above 50°F for at least 8 hours after application. The surface needs about 6 hours before it can be walked on and 24-48 hours before vehicle traffic. Any deviation in temperature or moisture can ruin the application.
Given the precise requirements for preparation, mixing, and application, a DIY skim coat is a challenging project that often leads to peeling, cracking, and disappointment within a short time.
Beyond DIY: Launching Your Driveway into the Future with Professional Coatings
A DIY skim coat might feel like an achievable weekend project, but the reality is that it’s a temporary fix prone to failure. Improper preparation, mixing errors, and weather issues often lead to a frustrating cycle of repairs. This is where professional polyaspartic coatings truly shine, offering durability and beauty that a thin cement overlay cannot match. When you’re ready for a permanent solution, our Polyaspartic Driveway Coating systems deliver a stellar first impression.

DIY Skim Coat vs. Professional Polyaspartic Resurfacing
The difference between a DIY skim coat and professional polyaspartic resurfacing is like comparing a paper airplane to a spacecraft. A skim coat might last a few years under ideal conditions, but it offers no real protection against traffic, weather, and UV exposure. In contrast, our professional polyaspartic coatings are engineered to last a lifetime, backed by a comprehensive warranty. They create a permanent, protective barrier that shields your concrete from damage.
While the upfront material cost for a DIY skim coat is low, the frequent need for reapplication makes it a poor long-term investment. The cumulative cost of materials and your time quickly surpasses the one-time investment in a professional coating. For a breakdown of long-term expenses, see our guide on the Cost to Redo Concrete Driveway.
Custom Finishes and an Out-of-This-World Conclusion
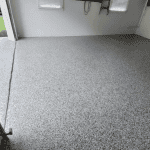
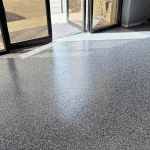
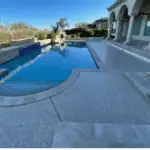
Professional coatings also offer a universe of design possibilities. Our decorative flake system is a homeowner favorite, creating a high-end granite look with dozens of color blends. Unlike a plain gray skim coat, these systems are UV stable, meaning they won’t fade or yellow. They also resist chemicals, stains, and tire marks, making maintenance effortless. Learn more about how our systems compare to others on our Concrete Coating Types page and how to Prevent Tire Marks on Driveway.
Lisa M. shared her experience, saying, “We had our driveway done and it looks amazing. The crew was very professional and did a great job. We are very happy with the results and would highly recommend them.” This reflects the lasting change possible with a professional-grade solution.
When considering how to skim coat concrete driveway, you’re choosing between a temporary patch and a permanent upgrade. At Galaxy Concrete Coatings, we believe your driveway deserves a solution that protects your investment and boosts curb appeal for decades. David P. from Phoenix agrees: “The Galaxy team did an amazing job on our garage floor. From the initial consultation to the final installation, everything was seamless. The quality of work is outstanding…” Let our expert Concrete Coating Installers bring that same excellence to your driveway.
Ready to transform your driveway with a coating that’s light-years ahead? Explore our Residential Driveway Coating options and see why homeowners across Phoenix, AZ, Tucson, AZ, Indianapolis, IN, Cincinnati, OH, and Denver, CO give us stellar 5-star reviews. Take your concrete out of this world!